Day 6 - July 5, 2022
Topics Covered
- Navigating between screens
- Passing data between screens
- Customizing navigation header bars
- Tab and drawer navigators
- Handling state
Navigating between screens
Most apps will have some sort of navigation requirements. In React Native, we can accomplish this using
the react-navigation package. Let's start off with an example.

In previous code examples, we typically return a function to render JSX to the screen. In the above
example, we are not returning JSX in the way we are used to. Instead we call the
createStackNavigator() function from the createAppContainer() function.
The first argument of the createStackNavigator() function determines what screens will be
handled by the navigator. Each screen is simply a React component and is specified as a mapping in a
plain JavaScript object: { Home, Settings }.
The second argument includes options to fine-tune the navigator. In the code example, we set the default route (or screen) to be displayed after the application is started.
Take a look at the Home and Settings functions. As mentioned earlier, these
are React components. In fact, they are Functional React components. Eact component receives a
navigation argument. This argument is passed to your screen by
react-navigation and contains all of the routing functionality you need. We use the
navigate() function to transition to different screens. The navigator component handles the
transition on our behalf, so we don't need to worry about hiding or showing components.
Copy the code and run the code example. When the program is started the Home component is
displayed. Clicking on the Go to Settings button will navigate to the Settings
component. After navigation, the Home component is hidden, the Settings
component is displayed, and the title is updated to reflect the new screen. There are two ways to return
to the Home page. The user can click on the Go Back Home button or use the
navigation bar. It contains a Back arrow button that will return the user to the previous
screen. If you run the application on Android, you can also use the standard back button found outside
of the app.
Passing data between screens
We learned that the react-navigation package offers an easy way to transition between
screens in our application. In the last code example, each screen is independent of the previous screen.
In other words, we are not passing data between the screens. Think of a shopping cart application. A
common feature (requirement?) is to allow the user to choose an item and view details about
that item before they buy it.
react-navigation makes it easy to pass data between components. When calling
navigate(), simply pass a JavaScript object as the second argument. A component can use the
getParam() function to receive key/value pairs from that object. Let's look at another
example. Pay attention to lines 10-12 where you see
navigate("Details", { title: "First Item" }), here we are passing information to the
Details component. On line 20, the value is received and displayed by the
Details component.

Customizing navigation header bars
The navigation bars you've seen so far are pretty basic - they contain the route name and a back button. Let's make the navigation header for the details page more intuitive.
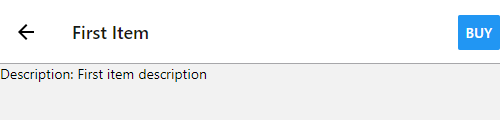
The first thing you will notice is that we are now passing more data to the Details
component. Since we are using functional components, we can customize the navigation header by setting
navigation options as shown on lines 37-44. Instead of showing the route name,
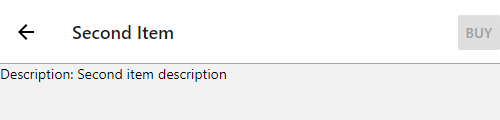
the navigation header now shows the item title. Additionally, a button is added to the nav bar to allow
users to purchase the item. The button won't do too much since the onPress event hasn't
been handled but it does transition into the disabled state if there is insufficient quantity remaining:
disabled={navigation.getParam("qtyAvail") === 0}.
Tab and drawer navigators
So far, we used stack navigator and Button components to link to other
screens. Instead, you may prefer to use a bottom tab navigator or a drawer navigator.
In the next code example, we are using Platform.select() to determine what OS our
application is running on then we are rendering the appropriate navigator. If the app is running on iOS,
we use a bottom tab navigator, on Android, a drawer navigator, or on any other device, a stack
navigator. So, depending on what OS the app is run on, the navigation will appear differently.
It is worth noting that you aren't lmited to using tab navigation on iOS and drawer navigation on
Android. Each navigator can be used on any device. This was however a great way to remind you of the
Platform.select() function.
Handling state
We have already learned how to work with state. As a reminder, state is data that is passed down to components so that the components can render or change this data. But how do we work with state at the same time as navigators.
In the following example, we will make modifications to the application introduced in the topic
Customizing navigation header bars. Start off by looking at the App() function.
This is a functional component and therefore we are calling useState to set up default
state values. We then define a function called decrementItem(). This function will decrease
the quantity available for a single key in the state object. Finally, we return the navigator component
but first we pass a property called screenProps. screenProps will allow the
components contained in the navigator to access the state data.
Looking at the ItemList component, a change was made in the function declaration to include
the items screen property passed into the navigator. It is used during in the JSX to render
the navigator buttons. It probably would have made more sense to render each <Button>
dynamically using the keys contained in the items object, but instead they were hard-coded.
Finally, in the Details component, navigationOptions have been set up in a way
that allows the Buy button to update state. When the button is pressed, the
decrementItem() function is called thus reducing the quantity available. Upon clicking the
button, you will see the UI will automatically refresh to show the new state / quantity. When the
available quantity reaches zero, the button will disable, preventing additional clicks.